 Fieldmark Documentation
Getting Started as a Data Collector
This quick start guide is for new users working in a small team with an existing Fieldmark Notebook. You will need:
a mobile device or computer (see Hardware for compatibility and recommendations)
an internet connection, or be connected to the Fieldmark Server (for the initial installation)
an invitation to join a Fieldmark Notebook
1) Install the Fieldmark App
While you still have an internet connection, download the Fieldmark app from the Google Play or the Apple App stores:
Google Play: Fieldmark Android App
Apple App store: Fieldmark IOS App
Or open the Fieldmark app on a web browser on your desktop, or on a mobile device, at one of the following addresses:
Fieldmark web app: https://app.fieldmark.app
the server nominated by your organisation (see your Administrator for details)
your organisation’s server (for Enterprise users, see your Administrator for details)
2) Register and Login
When you open up the app for the first time you will see the login screen as shown here:
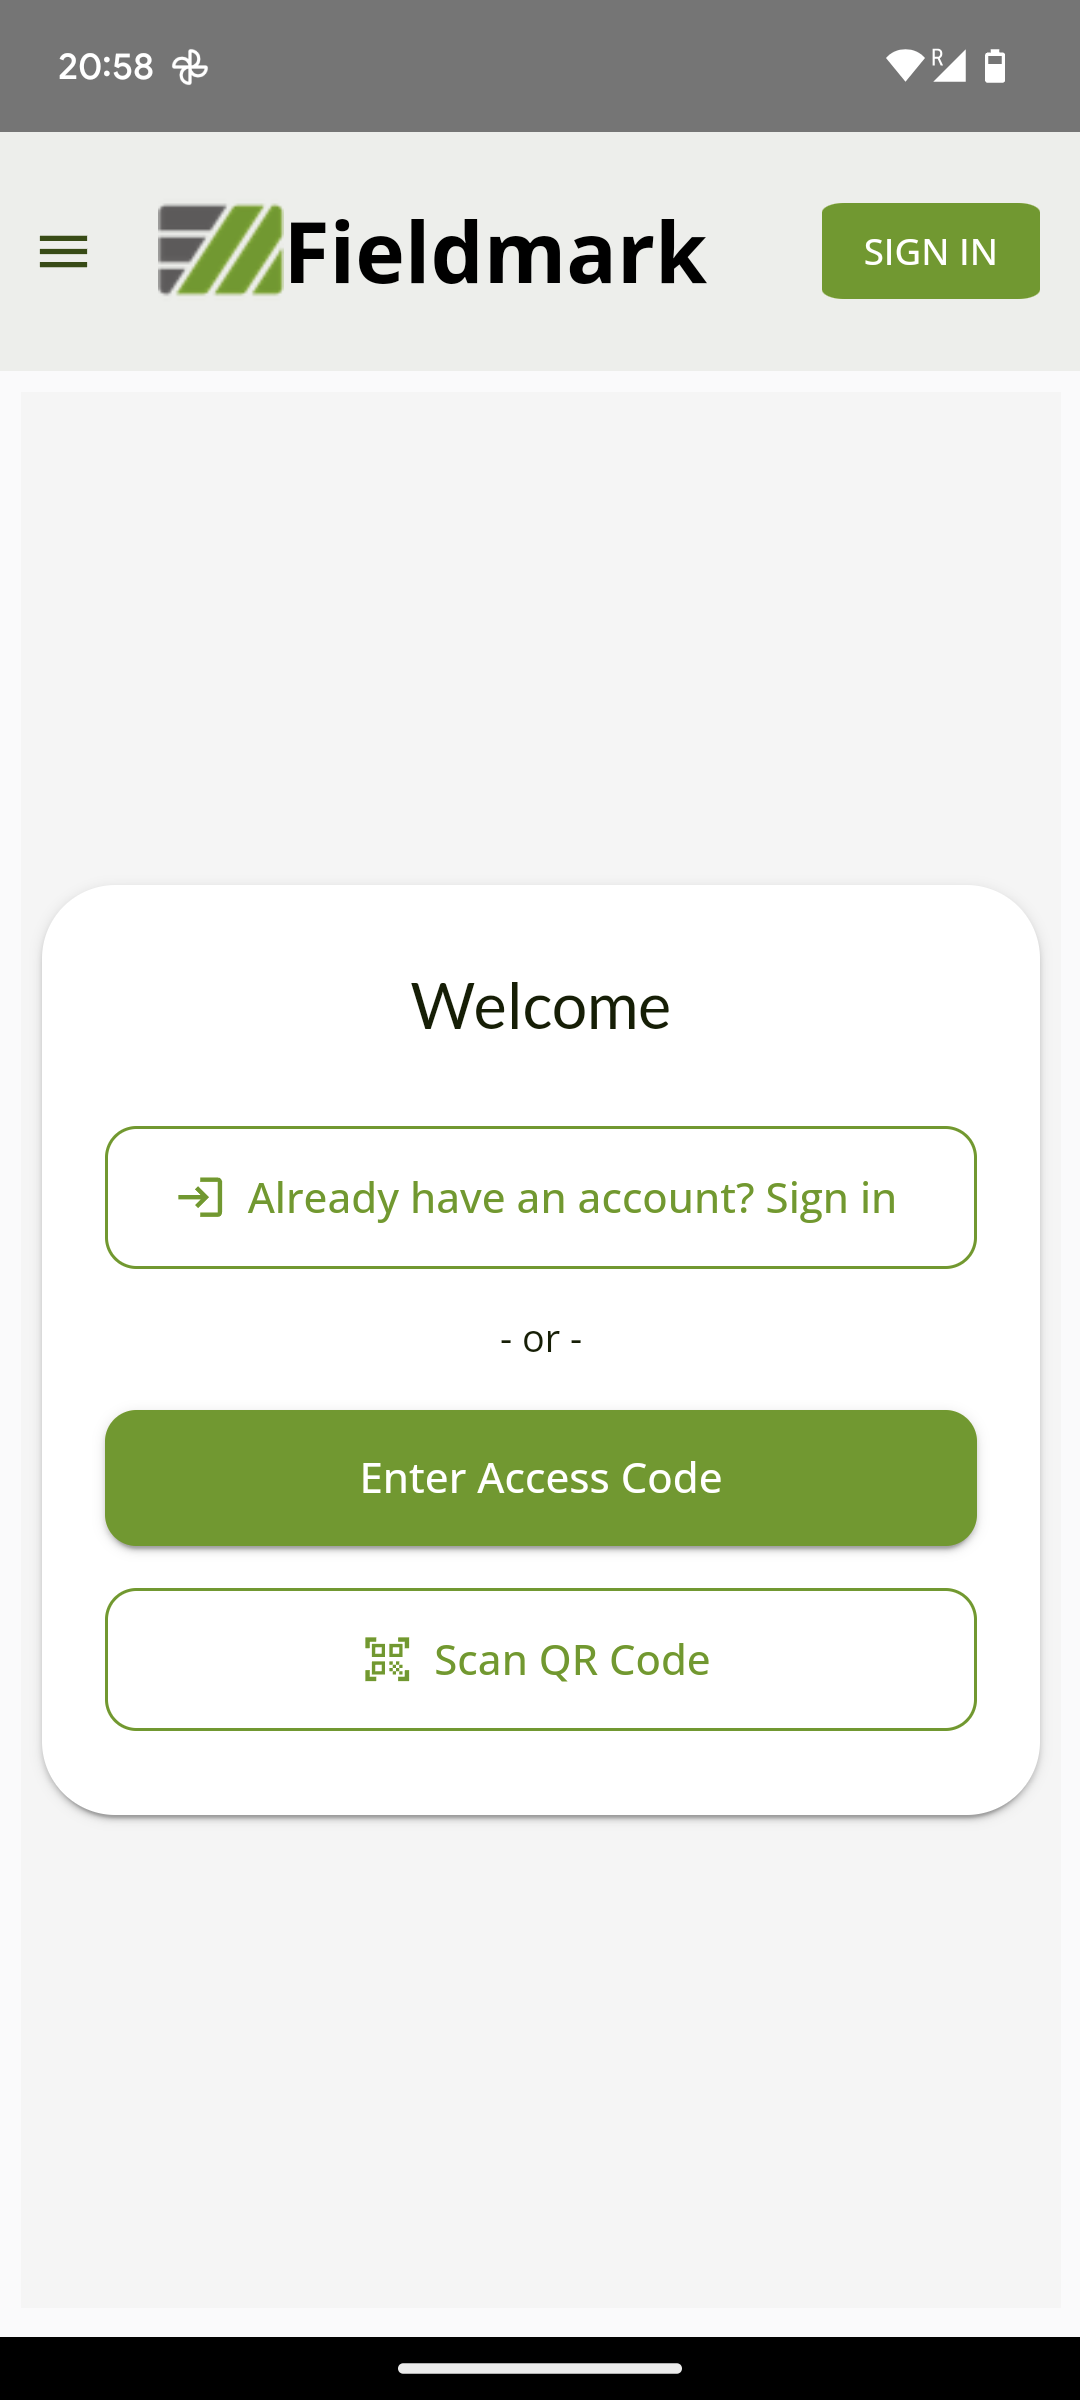
Depending on the version of Fieldmark that you are using, you may see the server selection option at the top of the screen or your server might be pre-configured. Server selection is used to connect the app to one of a number of Fieldmark servers; you might see the main server and one or more enterprise servers. Select the server for your organisation if that is configured.
From here you can login if you already have an account, or refer to your notebook invitation and:
scan an invite QR code (preferred), or
open an invite link, or
as a last resort, enter an invite code
to register an account and get access to that Notebook.
Note
If you already have an account on the Fieldmark server, use Already have an account? Sign in at the top of the registration screen instead of registering a new account. Once you are logged in you will be given access to the Notebook. For more information, see Login.
a) Invitations
Prefer scanning the QR code or opening the invite link shared with you. Tap Scan invite QR code. If you are already signed in, the notebook is added straight away; if not, the scan opens the registration screen.
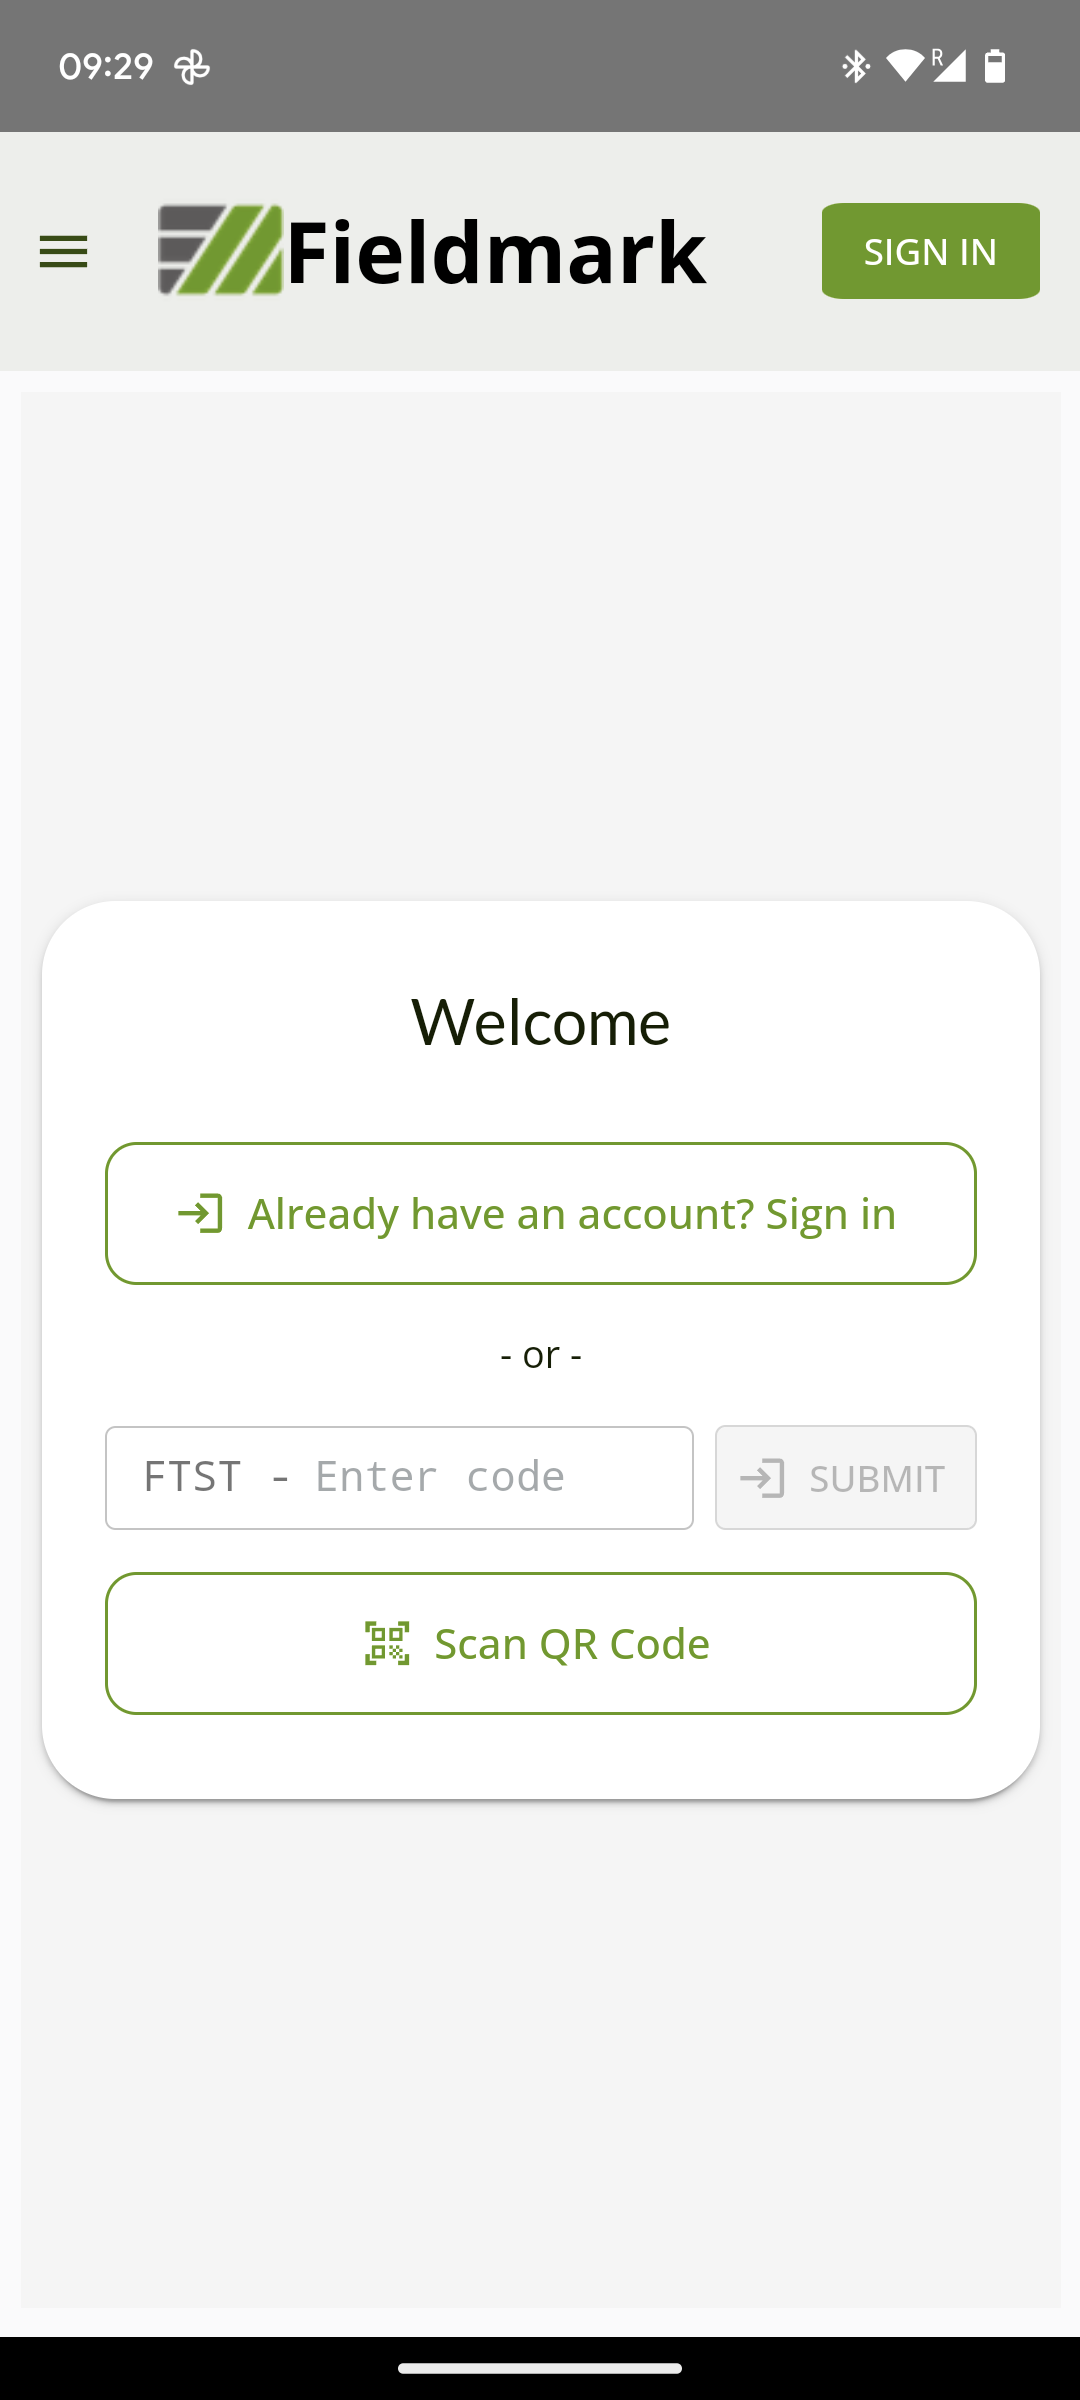
If you cannot scan a QR code, use Advanced: enter invite code instead and paste the full invite code (server prefix plus random code).
For more information see Invitations.
b) Registering with Fieldmark
If you don’t already have an account on the Fieldmark server, you will be able to register for an account at this point with either:
your email and a password, or
a supported authentication provider (eg. your Google account)
At this point, registration just gives you access to this one notebook but you may be given access to others in the future.
Note
You need an account on Fieldmark to collect data so that the records that you create can be associated with you. The Fieldmark server keeps minimal information about you: your name and email address. These are only used within the projects that you collect data for and will never be used for marketing or other purposes.
3) Activating your Notebook
After registering or logging in, you will see the main workspace screen in the app that shows the notebooks that you have access to:
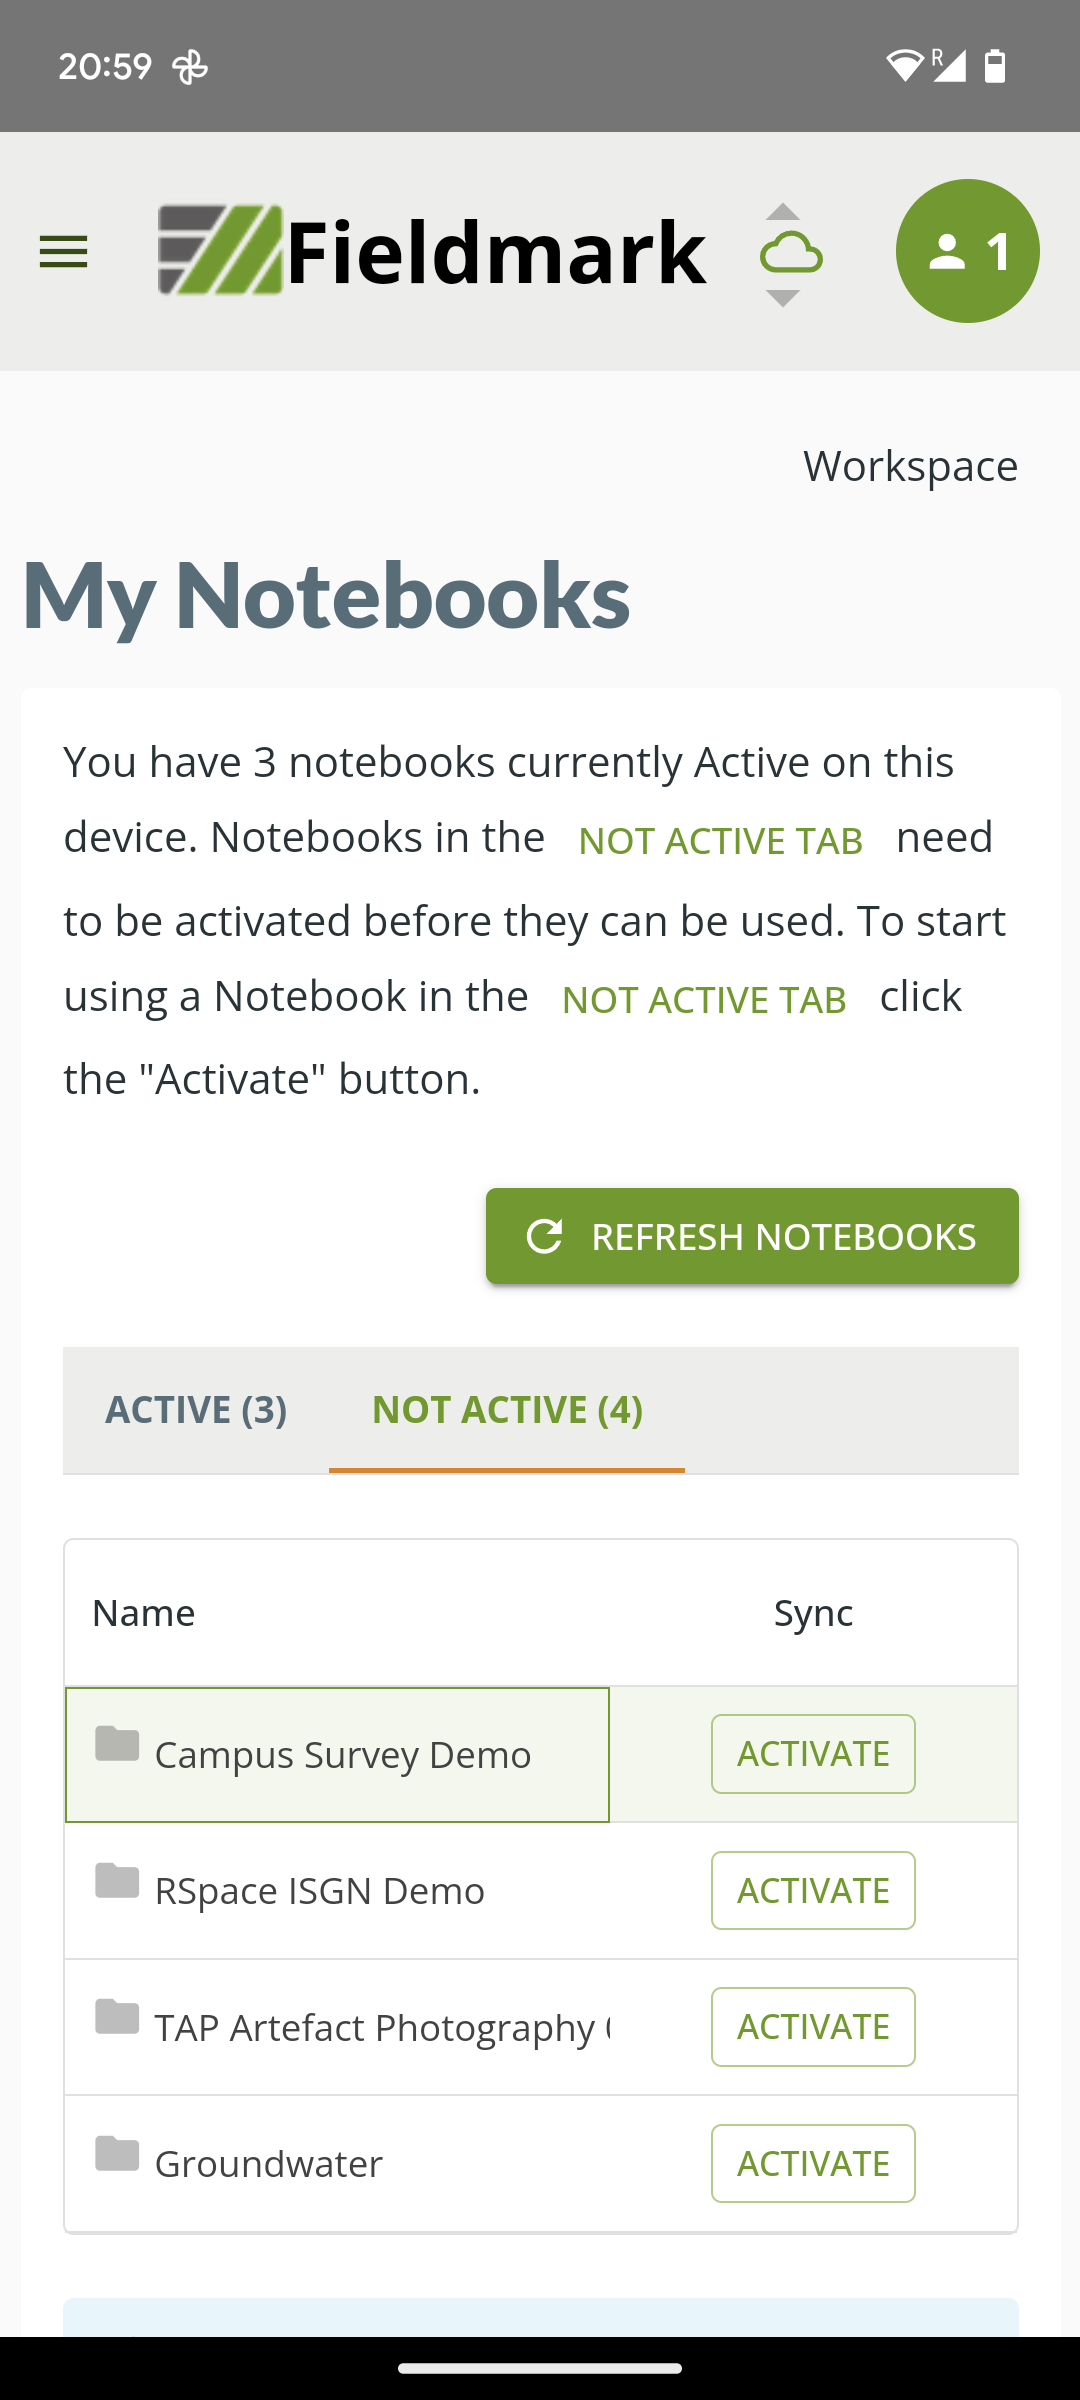
The notebook that you have just gained access to should appear in the Not Active list.
A notebook needs to be activated on your device in order for you to be able to collect data.
To activate a notebook on your device:
click on the Activate button next to the notebook, and
wait for it to appear in the Active list:
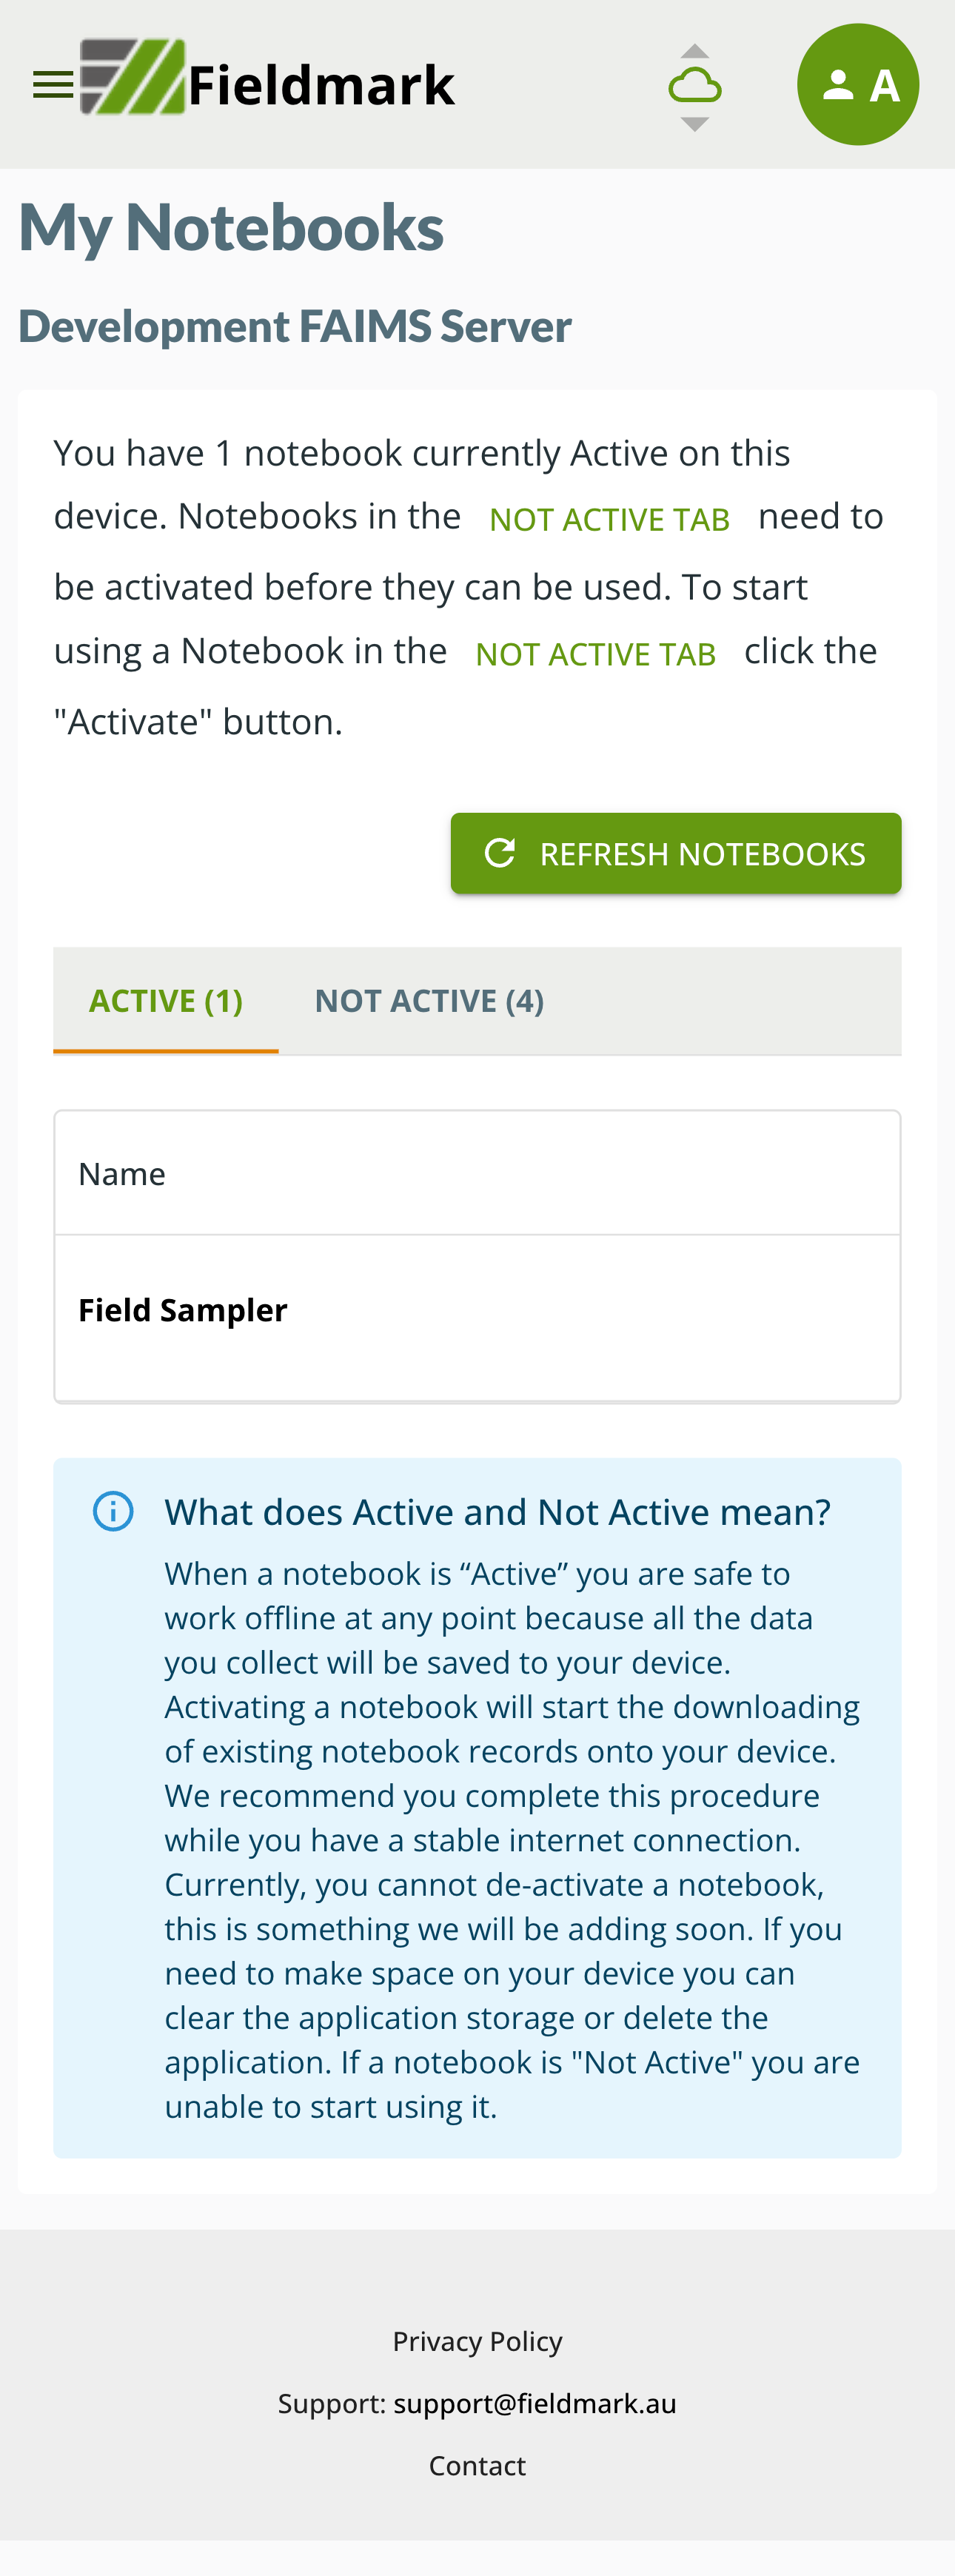
The sync process will now begin, linking your device to the server. You may able to see records from other users, depending on your role with respect to this notebook.
For more information see Activating Notebooks.
4) Using your Notebook
Once your notebook is activated, you can begin to create records and these will be automatically saved to the server. You may also be able to see records from other users, depending on your role with respect to this notebook.
As each notebook is a customised data collection tool, instructions for entering data will differ for each user.
See Using your notebook for more information.
5) Get more help
Explore the Fieldmark User Guide
See Troubleshooting for more information.